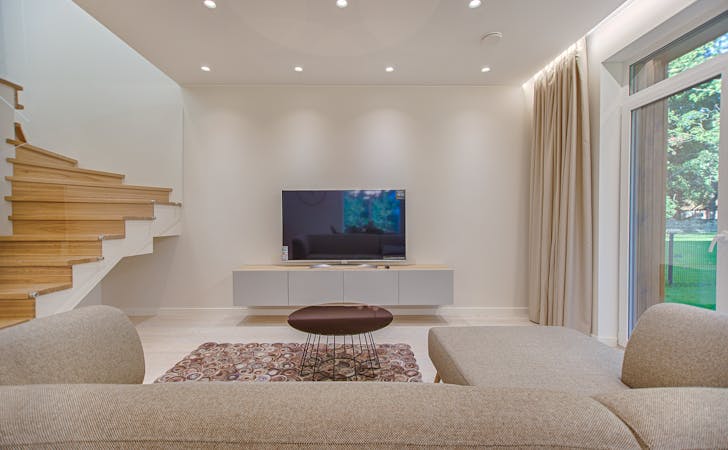
Ever stared at your TV and thought, “You could be so much more”? Well, you’re not alone. In a world where we all dream of sleek, artful living spaces, the big, black TV screen often feels like a visual speed bump. But what if I told you that transforming your average TV into a chic piece of wall art could be your next DIY project? And no, you don’t need to shell out big bucks for that fancy Frame TV. Let’s get crafty and make your TV the star of your living room—without breaking the bank.
Gather Your Toolkit
If you’re shopping for a TV, aim to buy the slimmest one you can afford so that it mimics an actual art frame
First things first: you need a TV. If you’re shopping around, aim for the slimmest model your budget allows. A low-profile mount will also be your best friend here, helping achieve that flush look we all adore. Remember, this DIY can be tailored to any TV size and style preferences, so you do you!
Measure Twice, Cut Once
Before you dash off to the home improvement store, arm yourself with precise measurements of your TV. Dreaming of a frame that hugs your TV from all sides? Measure the depth too, not just the height and width. This ensures you get a snug, custom fit that looks intentional from every angle.
Pick Your Trim
Whether you’re all about sleek modern lines or ornate detailing, choose a trim that speaks to your style
Now for the fun part: selecting your trim. This is where your TV frame starts to take on its personality. Whether you’re all about sleek modern lines or ornate detailing, choose a trim that speaks to your style. And don’t stress over the color; you’ll have the chance to paint or stain it later to perfection.
The Right Tools for the Job
Depending on your approach, the essentials might include a miter saw (for those precise cuts), corner clamps (because we’re not octopuses), wood glue, and your choice of stain or finish. Optional extras might include staples, a pin nailer, or corner brackets for added stability.
Cutting and Clamping
Cut your chosen trim to frame your TV, making 45-degree cuts at the ends for a seamless rectangle. A quick tip: check if the TV’s remote sensor is obstructed by the trim. If so, a little trimming (pun intended) might be necessary to keep channel surfing hassle-free.
Joining Forces
With all pieces cut, it’s assembly time. Glue your trim pieces together, using corner clamps to keep them aligned while the glue dries. Once secure, you can reinforce the frame with your chosen method of additional support. Patience is key—let the glue cure fully before moving on to the finishing touches.
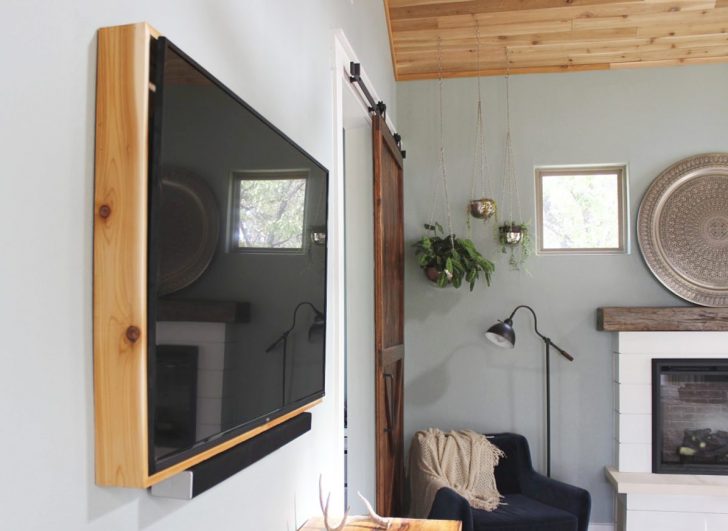
Finishing Flair
Staining or painting your frame is where your creativity really shines. Whether you opt for a rich walnut stain or a trendy Rub’n Buff finish, this is your chance to match your frame to your room’s aesthetic. Experiment with two-toned looks or antique finishes to add extra flair.
Mounting Masterpiece
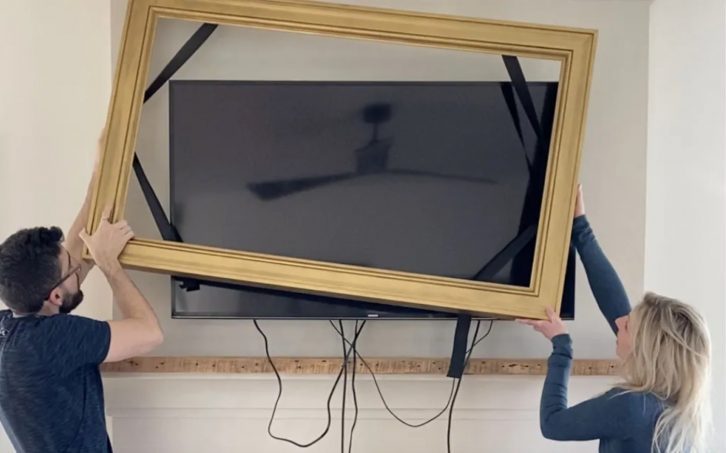
Make sure that there are no gaps between the frame and the TV to make the finished product look as seamless and chic as possible
How you attach your frame to the TV might depend on the snugness of the fit. Some go the museum putty route, while others prefer Command strips or a custom hanging solution. The goal? No gaps, just seamless art integration.
The Final Touch: Art Mode
To complete the transformation, explore your TV’s options for displaying art. Whether it’s a built-in feature or a clever YouTube find, rotating artwork can prevent screen burn-in and keep your living space looking fresh.
And there you have it—a TV that doubles as a stunning piece of art, all without the hefty price tag. Not only have you saved some cash, but you’ve also added a personal touch to your space that’s sure to spark conversations. Now, sit back, enjoy your favorite show, and bask in the glory of your DIY prowess. Your living room has never looked better.